The Nintendo Switch has quickly become the go-to console for local multiplayer experiences. With the option to play most games in handheld or table-top mode, the Switch is perfect for friends who want to hang out and have a good time with each other. There’s just one small catch: The Switch does not support controllers from other consoles. That means you can’t connect your PS4 controller to your Switch and play a game like Super Smash Bros. Instead, you have to get creative! Thankfully, there are ways around this limitation while keeping things fair and balanced. Here’s everything you need to know about connecting a PS4 controller to a Switch!
Can You Connect a PS4 Controller to a Switch?
While the Nintendo Switch is an entirely new console, you can connect your PlayStation 4 controller to the Nintendo Switch and use it with the console. In fact, there’s a whole host of peripherals that can be connected to the Nintendo Switch, so you can play games with a variety of controllers. As for connecting a PS4 controller to your Nintendo Switch, this isn’t as simple as it might seem. Accessing settings on your PS4 controller isn’t as easy as it would be on a smartphone or tablet.
How To Connect A Ps4 Controller To A Switch?
1. Connect a PS4 Controller to a Switch
Connecting your PS4 controller to your Nintendo Switch is a simple process. But you’ll need some additional software and hardware as well. In order to connect your PS4 controller to your Nintendo Switch, you’ll need:
2. Install the Drivers for the PS4 Controller
Once you have the necessary software and hardware on hand, connect your PS4 controller to the USB A port on your computer. Once connected, open up the drivers for your PlayStation 4 controller. You can find this software in Windows by navigating through Control Panel > Devices & Printers > Hardware > Device Manager. Once you locate the drivers for your PlayStation 4 controller, click on Update Driver Software and select Scan for Hardware Updates from within that window so that it scans all of the available driver updates for you. When it’s finished scanning, select Install from this list . Click on Next when prompted by Windows and follow any additional instructions that Windows gives you before installing the drivers.
3. Connect a USB C Cable from Your Computer to Your Nintendo Switch
Once you’ve installed all of the necessary drivers and successfully connected a PS4 controller to your Nintendo Switch, connect a USB C cable from one end of it to one end of a USB C cable that connects directly between two USB ports on your computer (not two USB C ports). You don’t need both ends of this cable plugged into two different computers; simply connect one end to the USB C port on your computer and the other end to a USB C port on your Nintendo Switch.
4. Power Up Your Nintendo Switch
Once you’ve connected a USB C cable from your computer to your Nintendo Switch, power it up by plugging it into an outlet. You should see the green light turn blue once you do this. If this happens, you’ve successfully connected a PS4 controller to your Nintendo Switch and can use it!
5. Attach the Controller to Your Computer
Once you’ve successfully connected a PS4 controller to your Nintendo Switch, attach it to your computer by removing the protective cover that covers up most of its ports (it may be covered with tape). Once inside, you can connect any of its ports to any of the ports on your computer. This includes + Power (The biggest port) + HDMI-A – HDMI output + HDMI-C – HDMI input + USB – USB A output + USB – USB C input Once you’ve attached a PlayStation 4 controller to your computer, open up the software that came with it so that you can configure it for use with Windows. This will also allow you to change which buttons are mapped as well as set up macros for certain key presses so that pressing one button will trigger multiple actions or inputs.
6. Configure Your Keyboard & Mouse
Once you’ve connected your PS4 controller to your computer, you can now begin configuring it for use with Windows. This will allow you to map which buttons are used for what actions and even create macros that will automatically trigger various inputs when pressed. It should also automatically launch the software that came with your PlayStation 4 controller when it is connected to your computer.
What You’ll Need
- PS4 Controller
- Nintendo Switch Dock
- USB Cable (for connecting the USB cable, also known as a micro-USB cable, to your computer and then to your Nintendo Switch)
- Play Station 4 System Software Update 3.60 or higher (which allows you to connect a PS4 controller to your Nintendo Switch)
- A computer with an internet connection that is connected to the internet through a wired or wireless connection (if you plan on connecting your Nintendo Switch through a wireless connection, make sure that you have enabled guest access on your router so that other devices can access the internet).
- A Nintendo Switch system (you can buy one or you can borrow one from a friend or relative).
- A USB cable (for connecting the USB cable, also known as a micro-USB cable, to your computer and then to your Nintendo Switch)
- An internet connection (if you’re planning on connecting your Nintendo Switch through a wireless connection, make sure that the device that is connected to the internet has enabled guest access on its router).
Using A USB Adapter To Connect A PS4 Controller To A Switch
If you’re using a USB adapter, you can connect your PS4 controller to your Nintendo Switch by following the steps below.
Attach the Controller to Your Computer
Once you’ve successfully connected a PS4 controller to your Nintendo Switch, attach it to your computer by removing the protective cover that covers up most of its ports (it may be covered with tape). Once inside, you can connect any of its ports to any of the ports on your computer. This includes + Power (The biggest port) + HDMI-A – HDMI output + HDMI-C – HDMI input + USB – USB A output + USB – USB C input Once you’ve attached a PlayStation 4 controller to your computer, open up the software that came with it so that you can configure it for use with Windows. This will also allow you to change which buttons are mapped as well as set up macros for certain key presses so that pressing one button will trigger multiple actions or inputs.
Configure Your Keyboard & Mouse
Once you’ve connected your PS4 controller to your computer, configure it for use with Windows by following these steps: 1) Click on “Start” in the bottom left corner and select “Control Panel” 2) Select “Game Controllers” and select “Add New Hardware” 3) Select “Next” 4) Follow the on-screen prompts and select “Next” again 5) Select “Install the software automatically (Recommended)” 6) Follow the on-screen prompts and select “Next” 7) Select “Finish” 8) Click on “Close Control Panel”
Install the Driver Software
Once you’ve connected your PS4 controller to your computer, download the driver software from Sony’s website. This will allow your system to recognize the device. Once you’ve successfully installed it, open up the software that came with it so that you can configure it for use with Windows. This will also allow you to change which buttons are mapped as well as set up macros for certain key presses so that pressing one button will trigger multiple actions or inputs.
Configure Your Keyboard & Mouse
Once you’ve connected your PS4 controller to your computer, configure it for use with Windows by following these steps: 1) Click on “Start” in the bottom left corner and select “Control Panel” 2) Select “Game Controllers” and select “Add New Hardware” 3) Select “Next” 4) Follow the on-screen prompts and select “Next” again 5) Select “Install the software automatically (Recommended)” 6) Follow the on-screen prompts and select “Next” 7) Select “”Finish” 8 ) Click on “”Close Control Panel”
Set Up Macros in Gamepad Companion Software
Once you’ve successfully configured your keyboard & mouse for use with your PS4 controller, you can start setting macros. Macros are key presses that will trigger multiple inputs or actions.
Conclusion
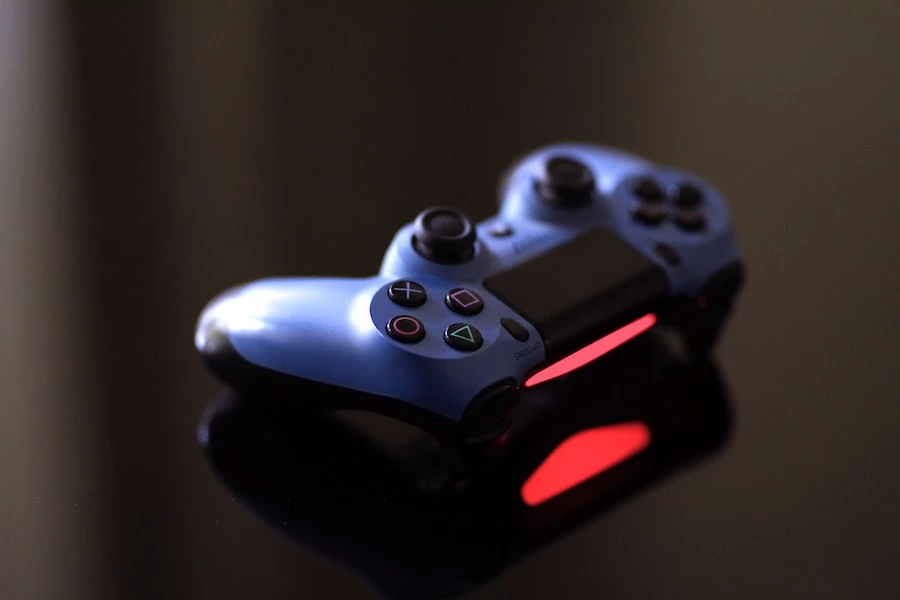
The PlayStation 4 controller is one of the most popular controllers on the market and with good reason. Well-built, comfortable, and functional, the PS4 controller is a great choice for any gamer. If you have a PS4 controller, you can connect it to a Nintendo Switch to play games, like Super Smash Bros Ultimate, using the controller. This can be done in several ways: you can use a USB Adapter, a Bluetooth connection, or an OTG cable. Whatever method you choose, you’ll be able to use your PS4 controller to play Switch games.